The bowline knot is recognized as one of the most versatile knots out there, and often referred to as the King of Knots. It is an easy knot to learn, and even after weight is applied, it is an easy knot to undo. Most commonly pronounced bo-lin, this knot likely dates back to a nautical start hundreds of years ago. There are some who suggest that Ancient Egyptians may have even used this knot.

The main purpose of the bowline is to create a fixed loop at the end of a rope. This knot can be tied around an object directly, or tied in advance so that the loop could be later secured over a pole or cleat. This knot holds up best if there is constant pressure pulling against the knot. The main problem that the bowline can have is working its way loose if the load of the knot is absent or constantly changing. While this may be a possibility, the bowline is still commonly used for mooring boats, rock-climbing, and even emergency rescue purposes when a harness is not available. When pressure is applied to the knot, it gets tighter, but the loop remains the same size, so there is no risk of the loop tightening and harming the victim. Because the knot tightens on itself, it is sometimes used in the equestrian world, and is even advised by the Federal Aviation Administration as the knot to tie down lightweight aircrafts.
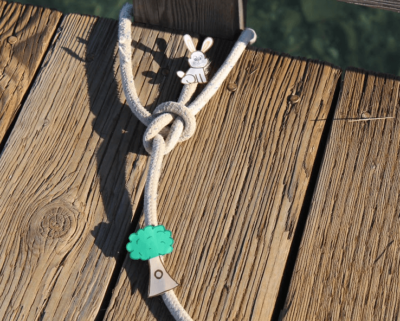
Bowline knots are easy to learn, and can even be tied with one hand after practice! To start though, one of the most popular devices for learning is to think of the rope as a rabbit and a hole. The rabbit will come out of the hole, go behind and around the tree, and back down the hole. First, a loop is made in the rope with your left hand, which will look like a number 6. This is the standing line, which will stay in place. In your right hand, you will have the tail of the rope. The tail will come up through the loop and go under the standing line. Finally, the tail of the rope continues around the standing line and goes back through the loop. Then, just remember to pull it snug. Once the knot is completed, it should look like the rope is wearing a little life jacket.
Written By: Jaclyn Lucas